
Steel rolling shutters are an increasingly popular choice for both commercial and residential properties due to their superior strength, durability, and security features. These versatile shutters not only provide protection against harsh weather conditions, but also act as a powerful deterrent against intruders. With a wide range of styles and designs to choose from, steel rolling shutters offer a stylish and practical solution for any property. In this article, we will delve into the various aspects of installing steel rolling shutters and explore the benefits they offer. From the installation process to their maintenance, we will cover everything you need to know about these highly efficient and innovative shutters.
Table of Contents
How to Install Steel Rolling Shutters?

Steel rolling shutters are an essential component of any building’s security system. They provide protection against theft, vandalism, and extreme weather conditions. As a civil engineer, it is important to know how to properly install steel rolling shutters to ensure their effectiveness and longevity. In this article, we will discuss the step-by-step procedure for installing steel rolling shutters.
Step 1: Measure the Opening
The first step in installing steel rolling shutters is to accurately measure the opening where the shutters will be installed. This includes the width, height, and depth of the opening. It is important to take accurate measurements to ensure that the shutters fit perfectly and function properly.
Step 2: Prepare the Opening
Before installing the shutters, the opening needs to be prepared. This includes clearing the opening of any debris or obstructions, ensuring that the frame is level and plumb, and making sure that the opening is structurally sound.
Step 3: Install the Guide Rails
Next, the guide rails need to be installed. These are the vertical tracks on each side of the opening that hold the shutter in place. The guide rails should be securely attached to the opening framework using anchors or screws. It is important to ensure that the guide rails are level and symmetrical on both sides.
Step 4: Mount the Shutter Box
The shutter box, which contains the rolled-up shutter, should be carefully mounted on top of the opening. It should be attached securely to the building’s structure using screws or bolts. The shutter box should be level and plumb to ensure proper operation of the shutters.
Step 5: Install the Shutter Slats
The individual slats of the shutter should be joined together using connectors that are provided with the shutter kit. These slats should then be slid into the guide rails and secured in place using end locks or clips. It is important to ensure that the slats are properly aligned and locked in place.
Step 6: Install the Bottom Rail
The bottom rail of the shutter should be inserted into the last slat and secured in place using screws or clips. This will prevent the shutter from being lifted from below.
Step 7: Install the Locking Mechanism
The final step in installing steel rolling shutters is to install the locking mechanism. This can either be a manual lock or an automatic locking system. It is important to ensure that the locking mechanism is properly installed and functioning correctly to ensure the maximum security of the shutters.
In conclusion, installing steel rolling shutters requires careful planning and precise execution. As a civil engineer, it is important to follow all safety guidelines and manufacturer instructions to ensure proper installation. Steel rolling shutters not only provide security but also enhance the aesthetics of a building. With proper installation, they can last for many years and provide peace of mind to building owners.
Material Specification of Rolling Shutter
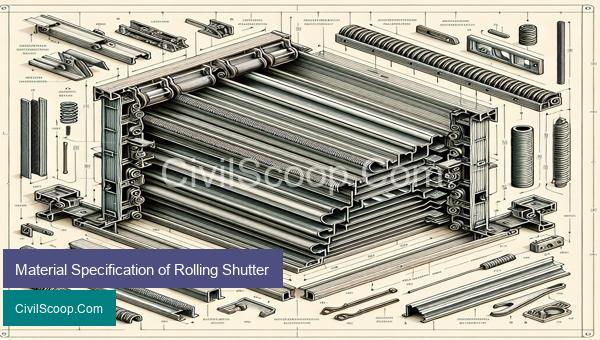
Rolling shutters are a popular choice for both commercial and residential buildings due to their efficiency, security, and ease of use. As a civil engineer, it is crucial to specify the appropriate materials for the construction of rolling shutters to ensure their safety, durability, and functionality.
The following are the essential material specifications for rolling shutters:
1. Metal Sheets: The most commonly used material for rolling shutters is metal sheets, such as steel or aluminum. These sheets are strong, durable, and provide excellent resistance to weather and external forces. The thickness of the metal sheets should be determined based on the size and purpose of the shutter.
2. Rolling Mechanism: The rolling mechanism is the core component of the rolling shutter that allows it to open and close smoothly. It is typically made of steel or aluminum and must be able to withstand repetitive movements without deformation or damage.
3. Guide Rails: Guide rails are installed on both sides of the shutter to support and guide its movement. These rails should be made of high-quality metal, such as galvanized steel, to ensure strength and stability. The size of these rails must be suitable for the size and weight of the shutter.
4. Locking System: The locking system is an essential element in the security of rolling shutters. It should be made of strong and durable materials to prevent forced entry, such as stainless steel or high-grade aluminum.
5. Bracket Plates: Bracket plates are used to connect the shutter to the building structure. These plates should be made of sturdy materials, such as steel, to withstand the weight and stress of the shutter.
6. Pulleys and Springs: The pulleys and springs are vital components of the rolling mechanism that aid in its smooth movement. These should be made of high-grade steel to ensure their durability and ability to withstand frequent use.
7. Additional Features: Some additional features that may be specified for rolling shutters include ventilation holes, insect screens, and insulation materials. Each of these must be carefully selected based on their intended function and material compatibility.
In addition to these material specifications, it is crucial to ensure that all materials used for rolling shutters comply with relevant building codes and standards. Testing and certification from authorized bodies should also be obtained to ensure the quality and performance of the materials used.
In conclusion, the material specification for rolling shutters should prioritize durability, strength, and functionality. As a civil engineer, it is crucial to carefully select and specify the appropriate materials to ensure the safety and longevity of rolling shutters in any building project.
Fixing of Rolling Shutter
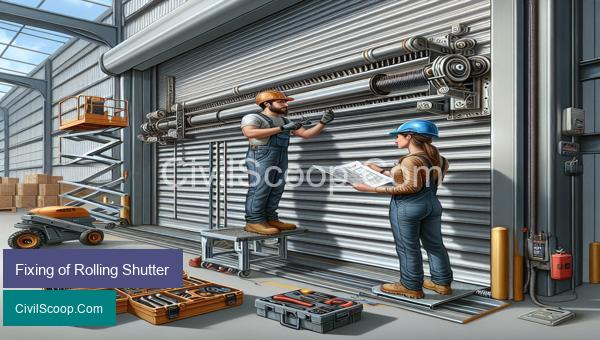
Rolling shutters are commonly used for securing buildings and spaces, as well as controlling light and ventilation. As a civil engineer, it is important to understand the process of fixing these shutters in order to ensure the safety and functionality of the structure.
Here are the steps involved in fixing a rolling shutter:
1. Survey and measurement: The first step in fixing a rolling shutter is to conduct a thorough survey of the site where the shutter is to be installed. This includes measuring the opening where the shutter will be fixed, as well as determining the dimensions of the shutter itself.
2. Designing the supporting system: Once the measurements have been taken, the next step is to design a strong and sturdy supporting system for the rolling shutter. This may involve installing MS or GI frames, beams, and lintels as per the design calculations.
3. Preparation of the opening: The opening where the shutter will be installed needs to be prepared for fixing. This includes cleaning the area and making sure it is free from any debris or obstructions.
4. Fixing the guide channel: The guide channel is an important component of the rolling shutter system. It is usually made of GI or MS and is fixed to the sides of the opening. The guide channel guides the shutter and helps to keep it in place while it is being opened or closed.
5. Installing the bottom bar: The bottom bar is also known as the bottom rail and is usually made of extruded aluminum. It is fixed to the bottom of the shutter and helps to keep it in place while it is being opened or closed. It also provides stability to the shutter and ensures a smooth operation.
6. Mounting the brackets: The brackets support the axle of the rolling shutter and are usually fixed to the top of the opening. The type and number of brackets required depend on the size and weight of the shutter.
7. Installing the rolling shutter: Once all the components have been fixed in place, the rolling shutter can be mounted. A crane or winch is usually used to lift the shutter and place it in the designated spot. The shutter is then secured in place by fixing it to the guide channel and bottom bar.
8. Testing and adjustments: After the rolling shutter has been fixed, it is important to test it to ensure proper functioning. Any adjustments or fine-tuning can be done at this stage to ensure smooth operation.
9. Finishing touches: The final step in fixing a rolling shutter is to add the finishing touches. This may include painting, lubricating moving parts, and fixing any loose screws or bolts.
It is important to follow proper safety measures while fixing a rolling shutter, especially while working at heights. It is also essential to use high-quality materials and follow the manufacturer’s guidelines for installation to ensure the longevity and performance of the shutter. As a civil engineer, it is your responsibility to ensure that the rolling shutter is fixed correctly and meets all safety standards.
Conclusion
In conclusion, steel rolling shutters offer a variety of benefits for homes, businesses, and other applications. From security and protection against harsh weather, to energy efficiency and noise reduction, these shutters have proven to be a valuable investment. Additionally, with their durability and low maintenance, steel rolling shutters are a long-term solution that can withstand various environmental conditions. As technology continues to advance, these shutters are becoming increasingly customizable and convenient, making them a practical choice for a wide range of buildings. Overall, installing steel rolling shutters can provide peace of mind and enhance the overall functionality and aesthetics of any property.